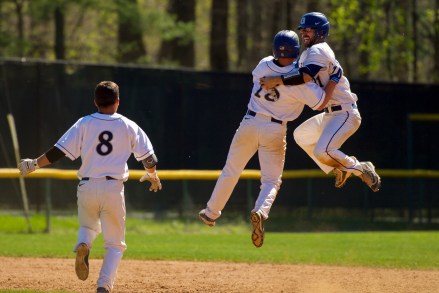
There’s nothing quite as fun as watching your child enjoy learning and playing sports. As a sideline parent, you have the important job of supporting them, no matter what goes on in the game. In addition to cheering on your kids, you may want to capture some photos of them so you and your child can remember their sports days for years to come!
But sports photos are tough to catch! How many times have you tried to photograph your child mid-shot only to wind up with a blurry photo? It happens to the best of us but there are a few simple tricks you can learn to decrease the chances of blurry or low quality photos of kid’s sports.
- Increase your shutter speed and use wide aperture
 Increasing your shutter speed is one of the best things to do if you want to decrease the risk of blurriness in your photo. Fast shutter speeds help you freeze the action. Selecting a wider aperture will allow for a faster shutter speed and it also creates a more shallow depth of field, which is critical when you are focusing on your player.
2. Pay attention to your surroundings
When you are framing your shot, you want to take the background into consideration. You don’t want anything distracting in the background that could distract from the subject of the photo. You may want to invest in a zoom lens to help you zoom in or you can experiment with different angles to get the best shot.
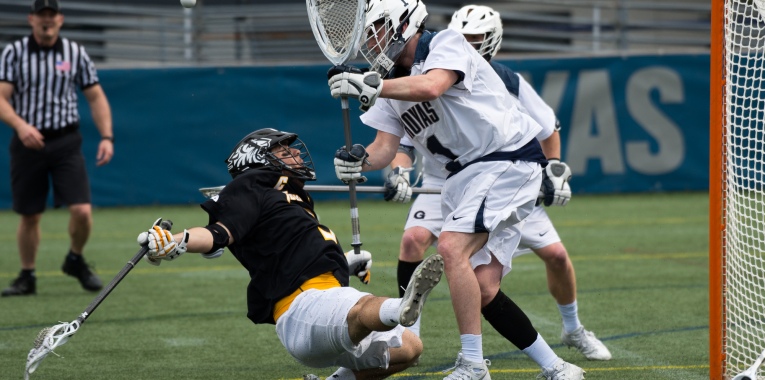
3. Get on their level
When shooting kids sports, you may need to get down on their level. After all, you want to capture their expressions and the experience as closely as possible. That can mean kneeling or crouching down to capture the photos.
4. Pay attention to light 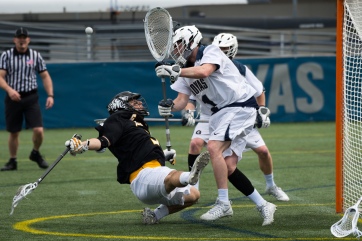
Good or bad lighting can make your photos look spectacular or turn them a terrible mess. If shooting outdoors on a bright sunny day, always try to shoot with the sun at your back to avoid being backlit. Cloudy days are by far the best for outdoor sports. The soft nature of the light coming through the clouds means you can shoot in any direction with no issues, but remember to raise your ISO to keep your shutter speed high. Indoor lighting can be poor and can make even the best composed photos look awful. The only solution is to use a lens with a big aperture and to increase your ISO even if it ends up higher that you’d like.
5. Don’t stop shooting
Even if you’ve think you have caught the perfect shot, it might not mean that you have! Keep pressing the shutter button to try to capture as many photos as possible. You never know what you will catch! And don’t miss out on the action because you’ve taken the time to look down at your photo after you’ve taken it. You can review your photos after the game but for now, keep shooting!

6. The photos don’t have to stop when the action does.
There is more to the game then when your kid is at bat or kicking the ball. Look for moments when they are laughing with their teammate or talking to the coach or high fiving another player. Those moments are magical in sports as well and sometimes, they are even more memorable than those action photos!
Finally, perhaps more important than anything, don’t be so focused on the photos that you miss the game. Sports can be an extremely special times in a child’s life and you don’t want to miss out on the moments because you’re trying to find the right angle for the shot! Every now and then, it’s ok to put down the camera and enjoy!
Want to improve your sports photography skills? Learn about our customized packages!


 copy")
 copy")
 copy")
 copy")
 copy")
 copy")
 copy")
 copy")
 copy")
 copy")
 copy")
 copy")


 A photographer’s job isn’t done after they’ve taken their last photo of the day. There’s still more work to be done once you have taken your camera home. It’s time to edit your photos! Choosing the right photo editing software is about finding a product that the right tools for your skill level and fits in your budget. Here are some of the most popular photo editing software applications available.
 Use Manual Mode
 Focus
Focus
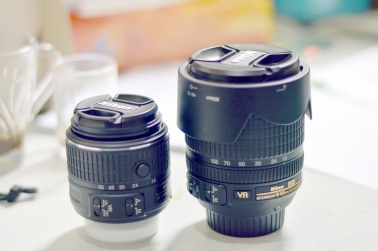 If you want to improve your photography skills, you will want to make the most out of your equipment. This includes knowing the right lens for your photos! A good camera lens can make a big difference in the look of your photos. There is no one right answer to which lens you should buy for your camera but it’s important to understand the difference between different lenses. Always try and use the best lens for the job at hand. Here are the most common lenses and how you should use them: